Today, I’ll show you a few quick techniques for creating abstract cosmic artwork in Photoshop CS5 – it’s all about layering, using brushes and working with blending modes. Let’s get started!
Final Image Preview

Start working by creating a new document (Ctrl+N) in Adobe Photoshop CS5 with the size 1280px by 1024px(RGB color mode) at a resolution of 72 pixels/inch. Use the Paint Bucket Tool (G) to fill with #44082A color the new background layer.

On the next new layer we’ll use the Soft Round brush from Brush Tool (B).
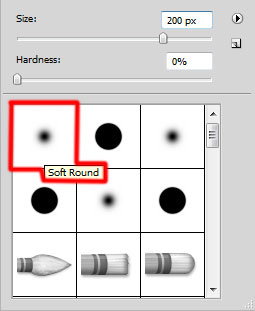
Use this brush to paint the background as in the picture below with the color #C22A3F.

Create a new layer again and use here the Soft Round brush mentioned above to continue painting the background with the color #822957.

Create a new layer and fill it with #74164D color, applying the Paint Bucket Tool (G).

Insert the mask on the layer by choosing Add layer mask on the bottom part of the Layers panel and then apply the next filter on the mask Filter > Render > Clouds.

Find a stock photo with a model represented on it, I used this photo from Shutterstock. I would like to thank theauthor of this photo, or if you prefer, you can substitute similar image of your own.

Remove the background using your favorite tools like Pen Tool (P), Magic Wand Tool (W), Magnetic Lasso (L) or even a simple Filter>Extract and insert it on a new layer in our main document.

Set the Blending mode for this layer to Hard Light.

Insert the mask on the layer by choosing Add layer mask on the bottom part of the Layers panel and choose the Soft Mechanical brush of black color.

Paint in the mask using this brush with different diameters to hide the model’s layer as it is represented below:

Create a new layer and select the Soft Round brush.

Use this brush to paint the background as in the picture below. The brush’s color is #F941FF. Place the layer under the model’s layer.

Create a new layer and use again the Soft Round brush mentioned above to make darker the background around the model. The brush’s color is #3A0822. Place the layer under the model’s layer.

On the next new layer we must create the next selection, using the Rectangular Marquee Tool (M) and place the layer under the model’s one.

Select the Soft Round brush to paint inside of the selection with white color (brush Opacity – 15%).

Press Ctrl+D to remove the selection. We’ve got the next result:

Using the Free Transform (Ctrl+T) command, we have to incline the created layer.

Make four copies of the last made layer and use again the Free Transform (Ctrl+T) command to place the copies as in the picture below.

Now we have combine in a group all the lines’ layers (press CTRL button to select the necessary layers and hold on the left mouse’s button while dragging the selected layers on Create a new group icon from bottom part of the Layers panel).
Insert the mask on the group by choosing Add layer mask on the bottom part of the Layers panel and choose the Soft Mechanical brush of black color.
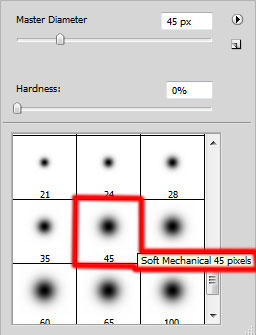
Paint in the mask using this brush to hide the lines edges as shown.

Set the Blending mode for the made group to Color Dodge.


Click on Add a layer style icon from bottom part of the Layers panel and select Drop Shadow.
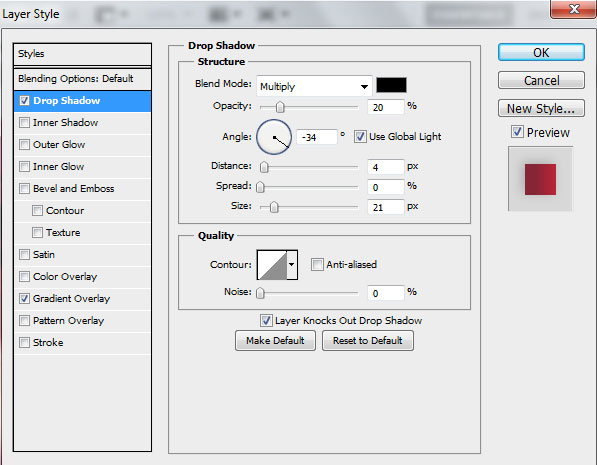
Add Gradient Overlay:
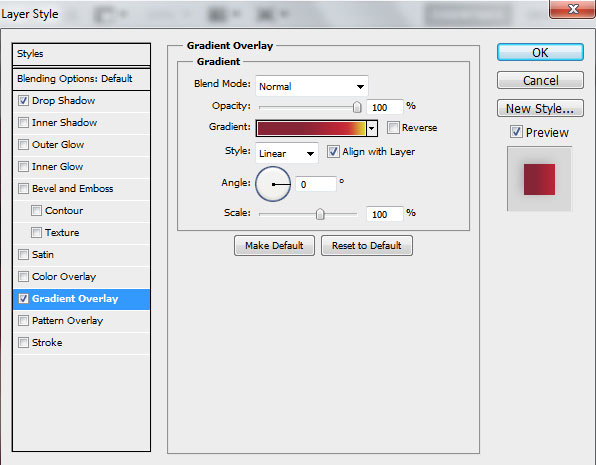
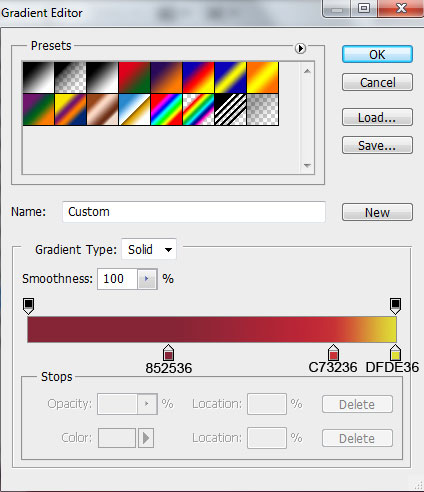
Click in the color bar to open the Gradient Editor and set the color stops as shown. Click OK to close theGradient Editor dialog box.
We’ve got the next result:

Make also four copies of the last made layer and choose the Free Transform (Ctrl+T) command to make smaller each next copy, placing them as below:

Combine in a group all the squares’ layers (press CTRL button to select the necessary layers and hold on the left mouse’s button while dragging the selected layers on Create a new group icon from bottom part of the Layers panel).
Make sure you have the group selected in Layers Panel and hold CTRL button and click on the model’s layer to make a selection.

Insert the mask on the layer by choosing Add layer mask on the bottom part of the Layers panel and finally press CTRL+I to cut out the squares.

Now we need to erase the squares behind the model, select the Soft Mechanical brush of black color and paint in the mask to remove squares from left side.

We’ve got the next result:

Using the Line Tool (U) (set Weight – 1 px in Options bar) we must represent many rays of white color, which layers should be placed under the model’s layer.

Set Blending mode to Overlay for each ray’s layer.

Combine in a group all the rays layers (press CTRL button to select the necessary layers and hold on the left mouse’s button while dragging the selected layers on Create a new group icon from bottom part of the Layers panel).
Insert the mask on the group by choosing Add layer mask on the bottom part of the Layers panel and choose the Soft Round brush of black color.

Use this brush to paint in the mask to hide the rays in the immediate zone of the model’s hair and face and also the rays’ edges.

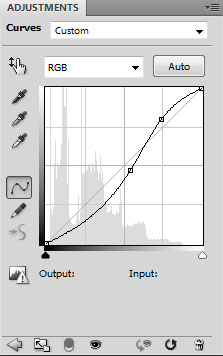
Click Create new fill or adjustment layer from bottom part of the Layers panel and click to Curves to adjust the curve shape as shown to make a little color corrections.
We’ve got the next result:

Create a new layer and select the Soft Round brush.
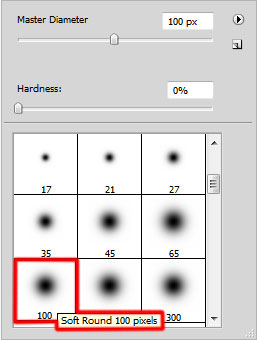
Use this brush to paint the background on the model’s right side as it is shown below. The brush’s color is#A5004F (brush Opacity – 15%)

Create a new layer again and use the Soft Round brush to make darker the canvas edges, the brush color is#340E21 (brush Opacity – 20%).

On the next new layer we’ll select the Soft Mechanical brush.

Use this brush to make lighter the model’s body, brush color is #8ADE00 (brush Opacity – 10%).

Set the Blending mode for this layer to Linear Dodge.

Create now a new layer and select the Hard Round brush.
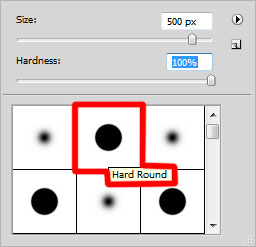
Use this brush to represent four small circles of white color (brush Opacity – 15%). We have to make smaller the diameter of each next circle. Place the layer under the model’s one.

Set the Blending mode for this layer to Overlay.

Using the Ellipse Tool (U), we have to represent an ellipse of white color.
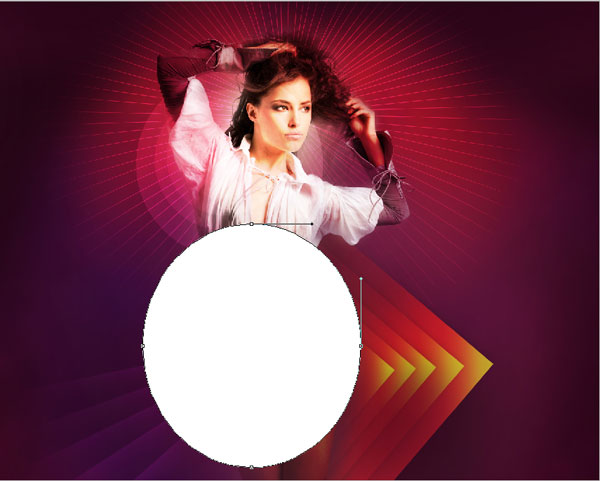
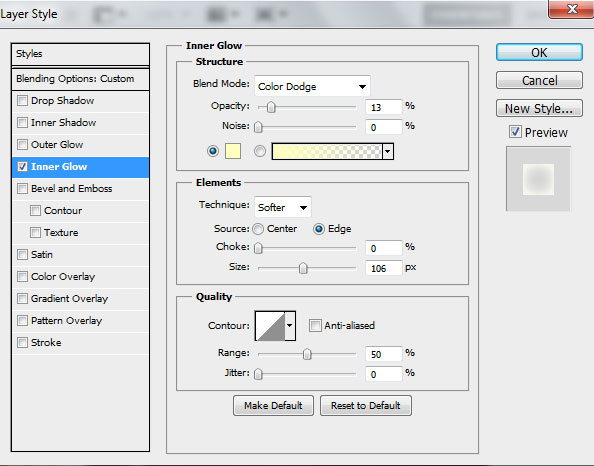
Set Fill to 25% for this layer and change the Blending mode to Overlay. Click on Add a layer style icon from bottom part of the Layers panel and select Inner Glow.
We’ve got the next result:

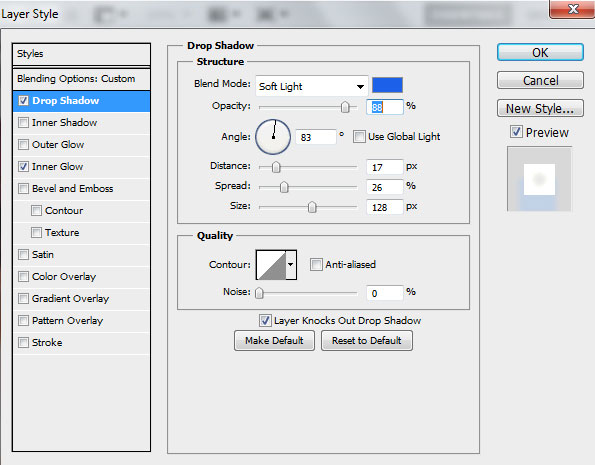
Make a copy of the last represented layer containing the ellipse and use the Free Transform (Ctrl+T) command to enlarge the copy, moving it to the left a little. We’ll change also the Blending mode to Hard Mix for the copy, also add the Drop Shadow:
We’ve got the next result:

Combine in a group all the layers containing the ellipses (press CTRL button to select the necessary layers and hold on the left mouse’s button while dragging the selected layers on Create a new group icon from bottom part of the Layers panel). Set Opacity to 47% for the group.

Make sure you have the ellipses group selected in Layers Panel and hold CTRL button and click on the model’s layer to make a selection.

Insert the mask on the ellipses’ group by choosing Add layer mask on the bottom part of the Layers panel and press CTRL+I. This way the ellipses will be cut. Use the Soft Round brush of black color to paint in the mask the same way we did with the rays and the squares.

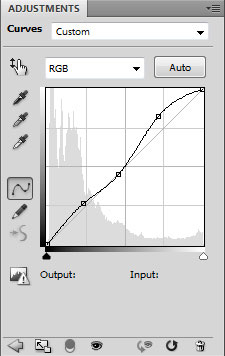
Click Create new fill or adjustment layer from bottom part of the Layers panel and click to Curves to adjust the curve shape as shown to make a little color corrections.
We’ve got the next result:

Create a new layer and select the Soft Mechanical brush.

Use this brush to paint the model’s waist on the left side. The brush’s color is #40274E and also on the waist’s edge and on the leg’s lowest part (brush Opacity – 10%).

Create a new layer and select the Soft Round brush of white color to represent many stars.
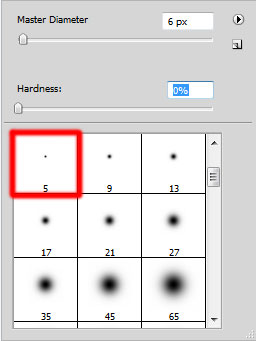
Apply different diameters for the brush and different Opacity value.

Create a new layer and use the Paint Bucket Tool (G) to fill the layer with white color. Insert the mask on the layer by choosing Add layer mask on the bottom part of the Layers panel and apply on the mask the next filterFilter > Render > Clouds.
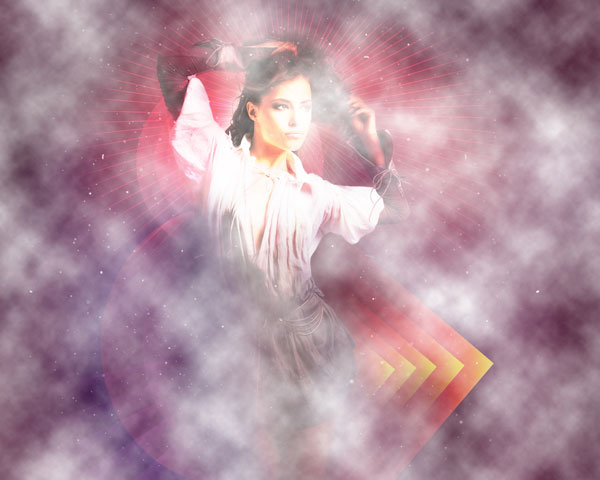
Set the Blending mode for this layer to Overlay.

Make a copy of the layer we’ve got. Create a new layer above the copied one and select both layers in Layers panel. Then press CTRL+E to Merge Down.
Insert the mask on the rasterized layer by choosing Add layer mask on the bottom part of the Layers paneland choose the Soft Round brush of black color (set Opacity to 20% in Options bar).

Use this brush to paint in the mask to hide the top part on the layer, around the model as it is shown below.

Click Create new fill or adjustment layer from bottom part of the Layers panel and click to Curves to adjust the curve shape as shown to make a little color corrections.
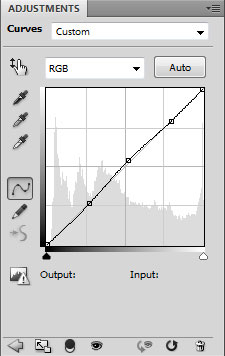
We’ve got the next result:

Our Abstract Cosmic Artwork using simple techniques in Photoshop CS5 is finished!
Source : AdobeTutorialz


