
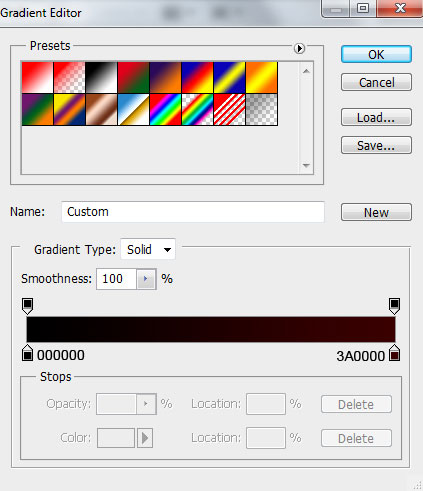
Start working by creating a new document (Ctrl+N) in Adobe Photoshop CS5 with the size 1920px by 1200px(RGB color mode) at a resolution of 72 pixels/inch. Click on Add a layer style icon from bottom part of theLayers panel and select Gradient Overlay.
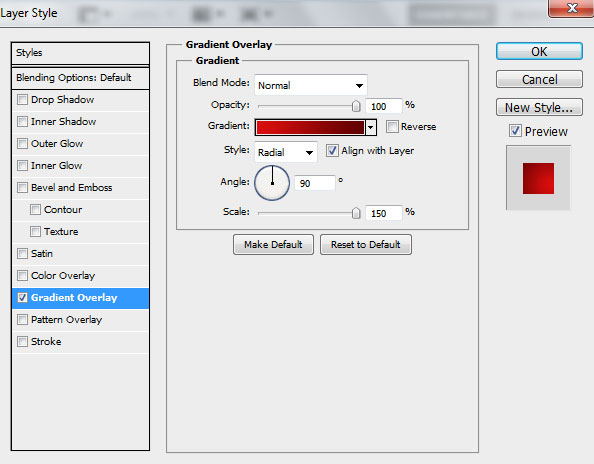
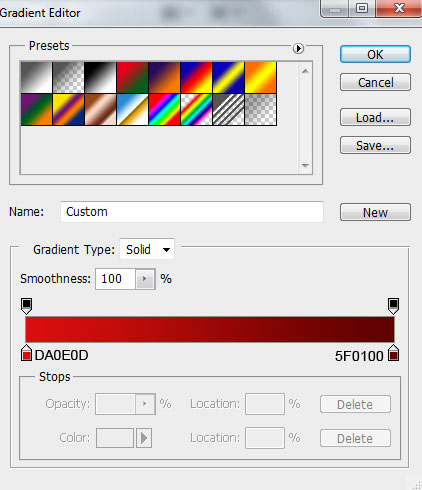
Click in the color bar to open the Gradient Editor and set the color stops as shown. Click OK to close theGradient Editor dialog box.
We’ve got the next background:

Next create a new layer and choose a Hard Rpund brush from Brush Tool (B).
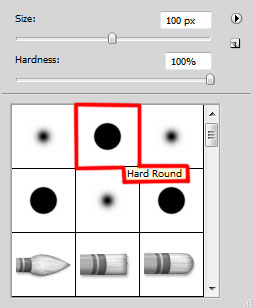
Use this brush to represent many small circles of #F00202 color. Apply the brush with a different Brush Size and different Opacity value.

Then start drawing the heart shape, choose the Pen Tool (P), set the drawing mode on Shape Layers inOptions bar and draw the next shape as shown.

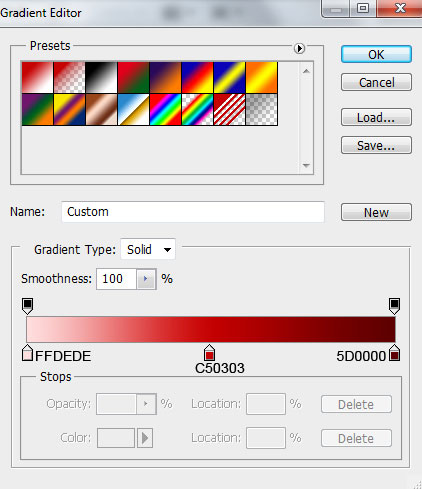
Click on Add a layer style icon from bottom part of the Layers panel and select Gradient Overlay.
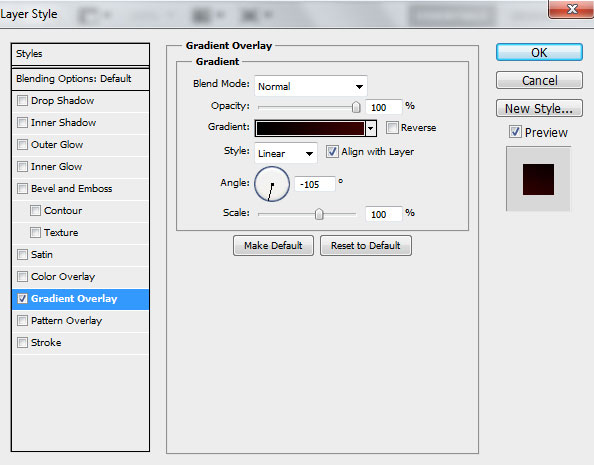
Click in the color bar to open the Gradient Editor and set the color stops as shown. Click OK to close theGradient Editor dialog box.
We’ve got the next heart:

Make a copy of the last made layer and remove the Gradient Overlay style from the copy. Choose the Path Selection Tool (A) to select the path as shown.

Press Alt+SHIFT and use the right arrow on the keyboard to displace a little the path copy.

Select the path using the Path Selection Tool (A) and use the Free Transform (Ctrl+T) command to make it smaller.

Select Subtract from shape area from Options bar. This way we’ll cut the middle part of the heart shape.

Then change the layer’s color on the white one.

Insert the mask on the same layer by choosing Add layer mask on the bottom part of the Layers panel and choose the Soft Round brush of black color.

Use this brush to paint in the mask to hide the next zones on the layer exactly the same way from below.

Create a new layer and choose the Soft Round brush applied before to paint on the heart’s surface. The brush’s color is #С50404.

Hold down Alt (Windows) or Option (Mac OS) and click between the brush’s layer and the layer containing the heart’s in the Layers panel to create a clipping mask.

We’ve got the next result:

Make one more copy of the very first heart’s layer and remove the Gradient Overlay style from the copy. Using the Free Transform (Ctrl+T) command, we can move the copy’s layer on the same place from below.

Insert the mask on the layer by choosing Add layer mask on the bottom part of the Layers panel and choose the Soft Round brush of black color.
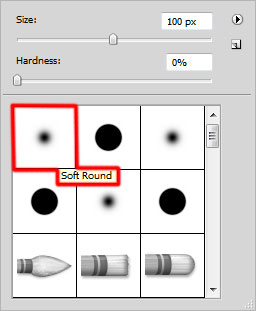
Paint in the mask using this brush to hide the next zones on the heart as it is shown below.


Set Fill to 0% for this layer and click on Add a layer style icon from bottom part of the Layers panel to selectGradient Overlay.
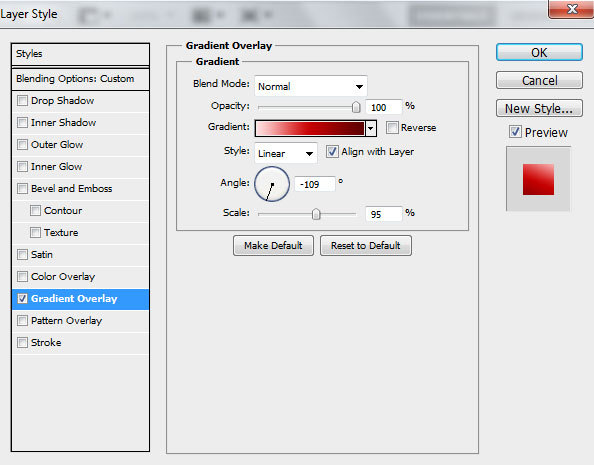
Click in the color bar to open the Gradient Editor and set the color stops as shown. Click OK to close theGradient Editor dialog box.
We’ve got the next result:

Insert the mask on the layer by choosing Add layer mask on the bottom part of the Layers panel and choose the Soft Round brush of black color (set Opacity to 40% in Options bar). Paint in the mask using this brush to hide the next zone on the highlight’s layer as it is represented below.

We’ve got the next result:

Combine in a group all the layers composing the heart (press CTRL button to select the necessary layers and hold on the left mouse’s button while dragging the selected layers on Create a new group icon from bottom part of the Layers panel). Make a copy of the got group and choose the Free Transform (Ctrl+T) command to make smaller the copy and to incline it the same way demonstrated next picture.

Let’s represent the shadow now under the hearts. In this case create a new layer and select the Soft Roundbrush of black color (Opacity – 20%).

Use this brush to represent a spot under the hearts.

Using the Free Transform (Ctrl+T) command, we can stretch horizontally the spot’s layer.

Next step we’ll download set of brushes for Adobe Photoshop, named: light_brushes_2. Copy the brushes file toC:\Program Files\Adobe\Adobe Photoshop X\Presets\Brushes folder (Adobe Photoshop X been your version of Photoshop).
Create a new layer and load the downloaded brushes, select the next brush from light_brushes_2 set:
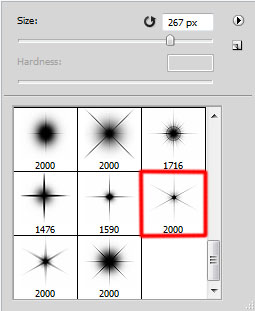
Use this brush to represent small stars of white color.

Click Create new fill or adjustment layer from bottom part of the Layers panel and click to Curves to adjust the curve shape as shown to make a little color corrections.
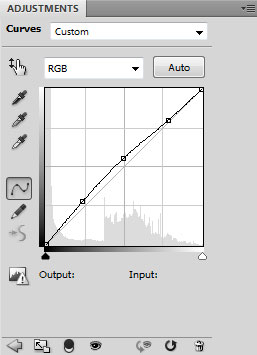
We’ve got the next result:

Insert the message text for greeting card. Select the Horizontal Type tool (T). Select a font, size and color in the Character panel.
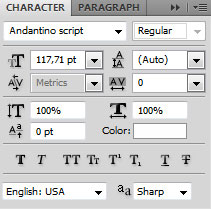
Click in the canvas and type ‘Happy Valentine’s Day’. Press Enter to apply the text.

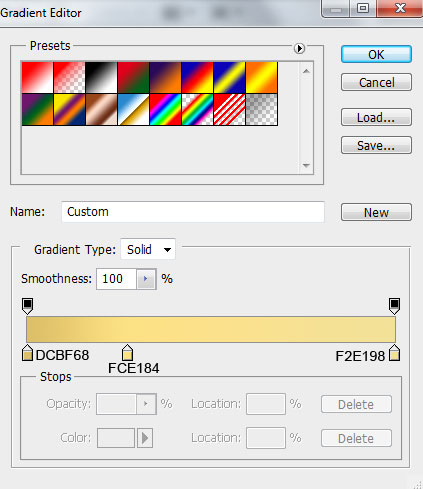
Click on Add a layer style icon from bottom part of the Layers panel and select Gradient Overlay.
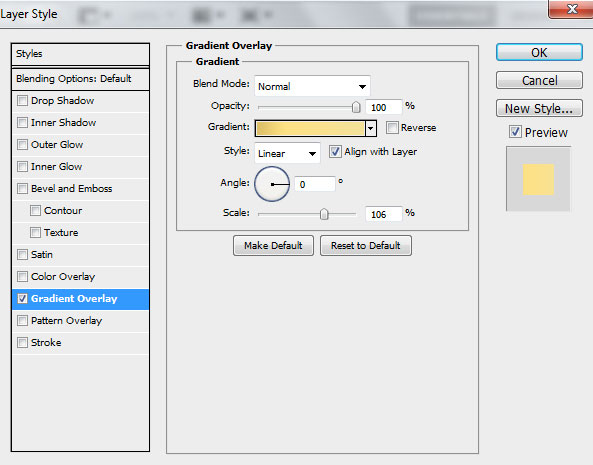
Click in the color bar to open the Gradient Editor and set the color stops as shown. Click OK to close theGradient Editor dialog box.
We’ve got the next result:

Our Festive Background for Valentine’s Day with Abstract Hearts is finished!
Source : AdobeTutorialz


